The Making Of: Blasted Ones Part 2
Yesterday I gave you the first part of a journey through the design process that we use here at O2 Games to take a unit from concept to final creation. Now let’s wrap it up.
A picture is worth….
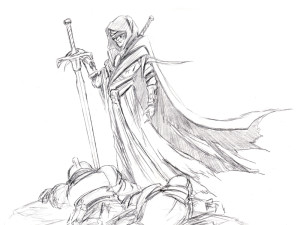
At this stage the Art department gets involved. Artist Michael Graham did a fantastic set of concept sketches for the Blasted One and we worked with him to refine the unit into the finished product. A combination of ragged outlaw, tortured leper, and resilient warrior merged together to make this fearsome and determined combatant. Their jeweled bracers give them a distinct look but also hint at their unfortunate technological heritage. Their leather armor and heavy cloak help to shroud them in a little mystery. Their eyes glowing behind their wrapped face revealing a trace of their magical nature.
After the concepts were completed it became time to work on the full color paints. Whenever we do a unit image, especially one as dynamic as the Blasted One, we prefer to get a few angles to work with. While costly, it helps ensure an accurate transfer into the 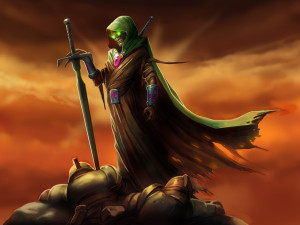 physical miniature. The color process gives us the ability to make some final changes to the look and to put the unit into the world for the first time. I have to admit that getting a full color HD image from the art department is one of the coolest parts of this job.
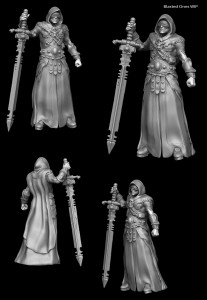
Time to CGI
All of our miniatures start their lives as 3D models in the computer. This lets us see the model as it is being formed as well as gives us the ability to input high levels of detail into the model as it progresses. This model making process is time consuming because we take extra care to check every detail. We use software such as ZBrush to design our files and occasionally other software as it’s called for.
Press Print Already!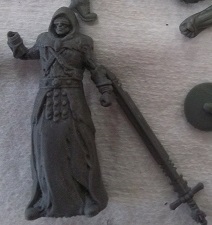
Once the model has been reviewed it is sent to the 3D printer to begin being converted into a true miniature. This process is extremely time-consuming due to the level of detail that we get out of our models. A single model can take an entire day to print and prints at layers of as small as 25 μm of thickness. Our printer is a high detail medical grade printer, that it is also used by medical device and implant manufacturers to produce some of the highest level detail renders. The level of quality and detail is well worth the wait.
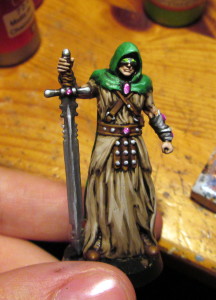 Once the 3D print is finished they go through a very in-depth cleaning and quality process before they are returned to a mold to be cast as masters. In the casting process we use the 3D printed model to make a master mold which can have between 8 and twelve of the model per mold. Our partners in the mold making process have perfected a highly detailed process that allows the level of quality and detail on our models to come through into the final molds. Finally the output is a solid metal playable miniature.
Wrapping up
There is still more work to be done, the cards themselves need to be made, and aeon cards tuned to fit this new addition to the roster. We often try to add a few extra Aeon cards especially for each unit that we add in to the game. They may not be obvious but if you look deep enough into the game and it’s mechanics you will find great synergy for your unit.
We greatly enjoy the process of making these models come to life and hope you will enjoy playing with them as much as we enjoy making them. See you through the Waygate!
~Rob
Lead Product Manager
